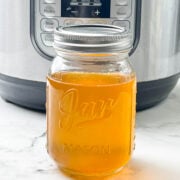
Homemade Ghee – Instant Pot & Stovetop
Learn how to make a homemade ghee recipe with grass-fed unsalted butter using the Instant pot with tips, and tricks. You can also make it in a stovetop pot.
Servings 1.5 cups
Calories 2168kcal
Ingredients
- 16 ounces unsalted butter grass fed
Instructions
Instant Pot Instructions
- Below are the steps for making ghee in Instant Pot using 1 Pound (16 ounces) of unsalted butter. Cooking time can vary depending on the type, quality, and temperature of the butter.
- Step 1: Melt the Butter. Unwrap the refrigerated unsalted butter. Place the butter into the instant pot steel insert and turn on the Saute (Normal) mode. Butter will start to melt.
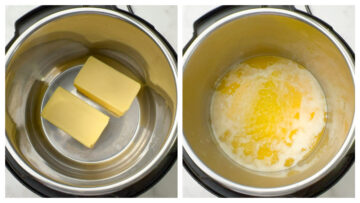
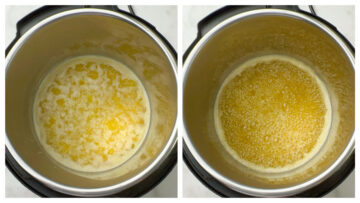
- Step 2: Simmer Until Milk Solids Separate. After a few minutes, the melted butter will form a white foam, float on top, and bubble. It will sputter a bit, as the water starts to evaporate.After a couple of minutes, the white foam will begin to clear, and the surface will be filled with tiny clear bubbles. The ghee color will gradually change from buttery pale yellow to light golden. The milk solids (milk protein) will begin to separate and sink to the bottom.
- Step 3: Let the Milk Solids Caramelize. Turn off the IP. The ghee will continue to cook, and the milk solids will begin to caramelize. It should be medium golden brown, not too dark. Keep a close eye on the ghee, to make sure that it doesn’t burnAt this stage, remove the steel insert from the pot to prevent it from further cooking. The ghee should be fragrant, with a rich, and nutty aroma.
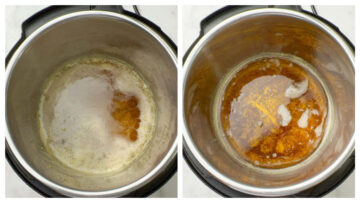
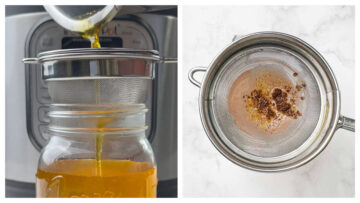
- Step 4: Strain and Store. While the ghee is still hot, Strain the ghee using a fine mesh sieve or cheesecloth, into clean, and dry glass or steel storage jars. Let the ghee cool completely before closing the lid.
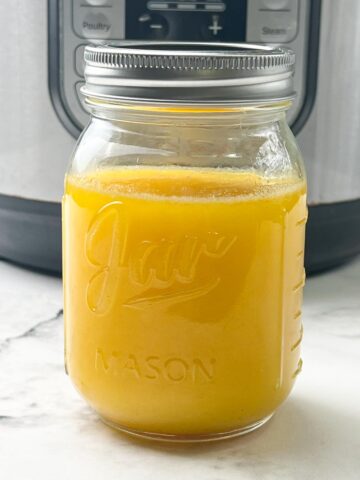
- The Ghee is in a liquid state and golden in color when it's hot. It sets to a semisolid state, grainy texture, and turns to a bright yellow color as it cools to room temperature.
To Make Ghee on Stovetop Pot
- Unwrap the refrigerated unsalted butter. Place the butter into a clean, dry, deep, and heavy-bottomed pot. Melt the butter over medium-low heat. Keep stirring intermittently. Do not cover.
- After a few minutes, the melted butter will start to froth up, and bubble. It will sputter a bit, as the water starts to evaporate.
- After a couple of minutes, the white foam will begin to clear, and the surface will be filled with tiny clear bubbles. The ghee color will gradually change from buttery pale yellow to light golden. The milk solids (milk protein) will begin to separate and sink to the bottom.
- Reduce the heat to low and continue cooking until the milk solids caramelize to a medium-golden brown. Be careful not to let them get too dark. Keep a close eye on the ghee to prevent burning.
- At this point, turn off the heat. The ghee should have a rich, nutty aroma and a golden hue.
- While the ghee is still hot, strain it through a fine mesh sieve or cheesecloth into a clean, dry glass or steel storage jar. Allow the ghee to cool completely before sealing the lid.
Notes
This recipe was created using a 6 qt Instant Pot DUO60 Multi-use Pressure Cooker.
Note: Nutrition values are my best estimates. If you rely on them for your diet, use your preferred nutrition calculator.
Tips to make the Best Homemade Ghee
- Butter - Use organic, good-grade unsalted butter to make ghee. I highly recommend Kerrygold butter.
- Cooking Pot - Use tall stainless steel or a heavy bottom pot to make ghee. It prevents the ghee from spurting when it froths and bubbles.
- Cooking Time - The cooking time will depend on the type of butter, quantity, quality, and temperature of the butter.
- Color - The color of the ghee may vary depending on the cooking time and also on the quality of the butter used.
- Storage Jars - Use clean, dry, mason jars or stainless jars to store ghee. I do not recommend using plastic jars to store ghee.
- Double the recipe - Feel free to double or triple, If you increase the amount of butter, cooking time will also increase.
- Flavoring Ghee - You can add some smashed garlic cloves or curry leaves while cooking ghee to enhance the flavor of the ghee.
Nutrition
Calories: 2168kcal | Carbohydrates: 0.2g | Protein: 3g | Fat: 245g | Saturated Fat: 155g | Polyunsaturated Fat: 9g | Monounsaturated Fat: 64g | Trans Fat: 10g | Cholesterol: 650mg | Sodium: 33mg | Potassium: 73mg | Sugar: 0.2g | Vitamin A: 7557IU | Calcium: 73mg | Iron: 0.1mg