
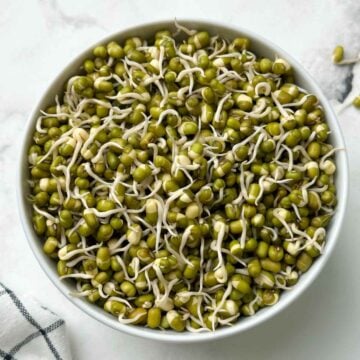
Learn how to sprout moong/mung beans easily at home with this step-by-step guide. Sprouted beans are nutritious and can be used in salads, sandwiches, curries, and many other dishes.
Growing up, I remember my mom making so many essentials at home instead of buying them from the market, like homemade ghee, freshly ground garlic paste, roasted cumin powder, sprouting beans, and many more.
Sprouting beans at home was also a practical method to add more fresh produce to our meals while saving money on shopping. Mung beans, lentils, or chickpeas-all of which are simple to sprout and have a moderate flavor-would normally be used by my family.
These crunchy sprouted beans are versatile and can be eaten either raw or cooked and can be used in the preparation of various dishes such as curries, dals, stir-fries, sandwiches, and salads. If you don't have time to sprout at home, you can find sprouted beans in the produce section at your local grocery stores.
Interested in learning more about the pulses used in Indian cuisine? Check out my comprehensive guide on Indian Pulses.
Jump to:
What Is Sprouting?
Sprouting is the process of germinating seeds, lentils, beans, grains, or nuts where they are soaked in water for a specific amount of time and then allowed to germinate, i.e., tearing their outer layers and the emergence of a new sprout.
Why Sprout Beans?
Sprouting often improves the grains, legumes, or bean's nutritional value by reducing the levels of anti-nutrients such as phytic acid. Phytic acid can also inhibit the absorption of essential minerals like iron, zinc, and calcium in the body, and can also interfere with digestive enzymes, leading to gas and indigestion.
How to Sprout Moong Beans
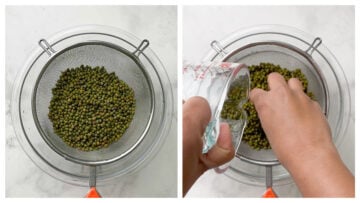
Step 1: Rinse And Soak
Rinse the moong beans thoroughly in cold water and remove any debris or damaged beans.

Transfer the rinsed moong beans to a large bowl and add 2-3 cups of filtered water to cover the beans by about two inches. Soak them for at least 8-12 hours. Just cover the beans with a thin kitchen towel. Do not cover the beans with a lid, as they may develop an odor.
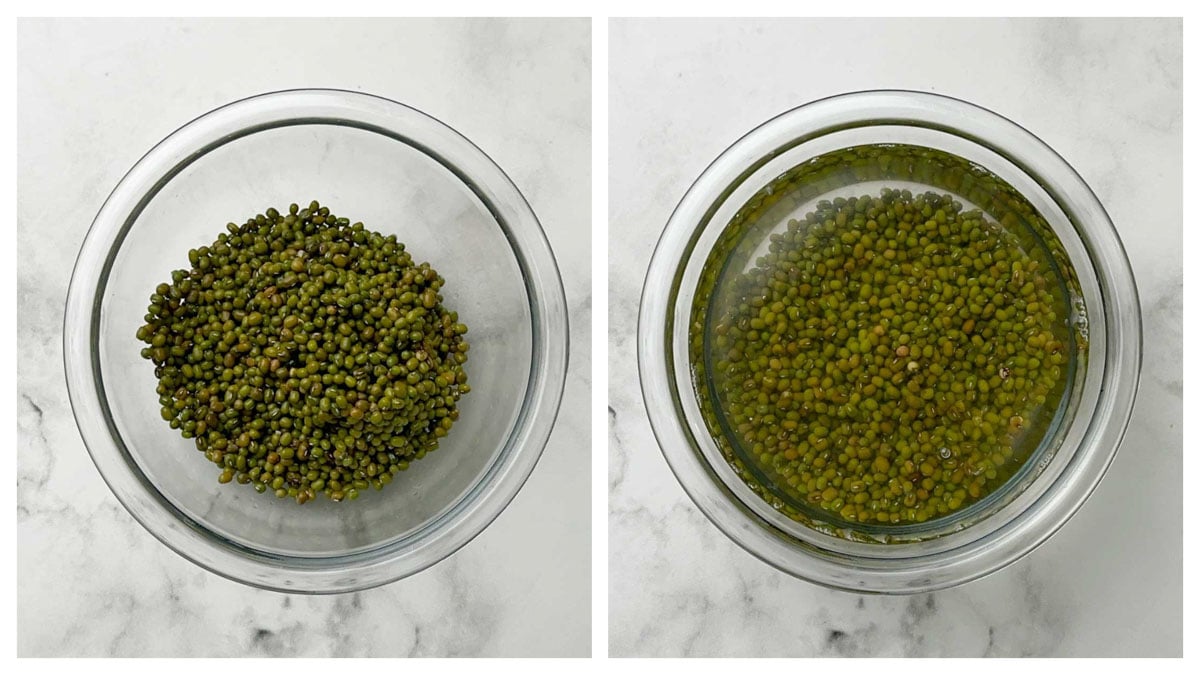
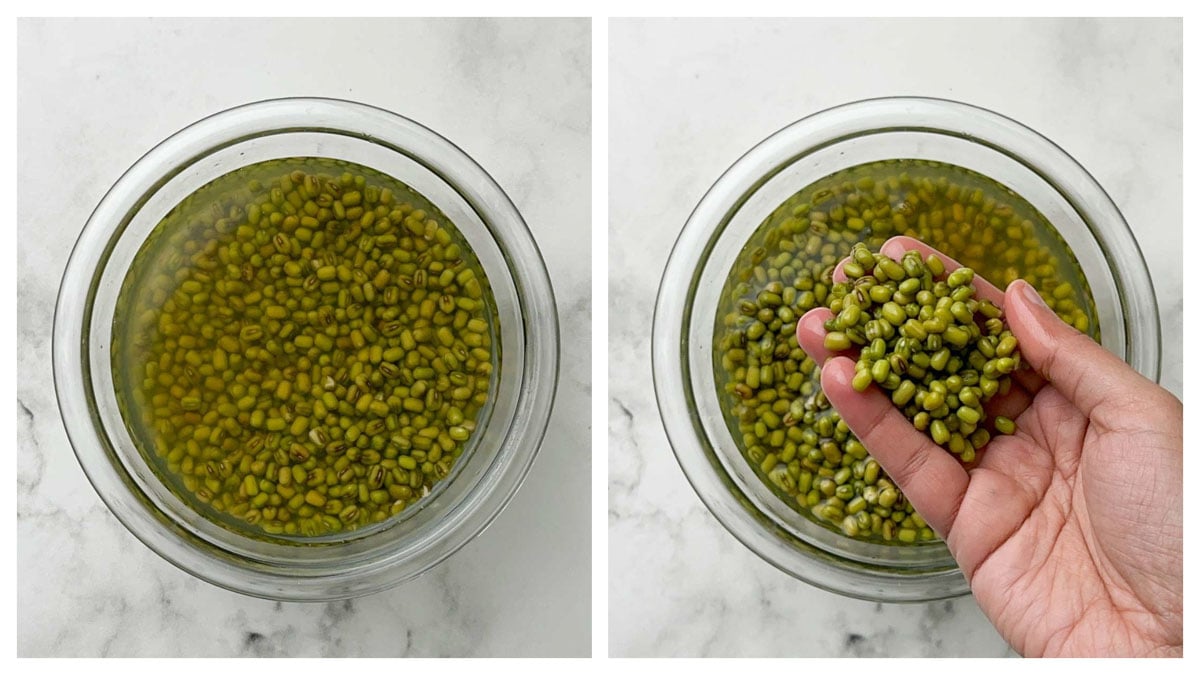
After the soaking period, the beans would have doubled in size. Discard the water and rinse the moong beans again under running water, and drain the water using a strainer or colander.
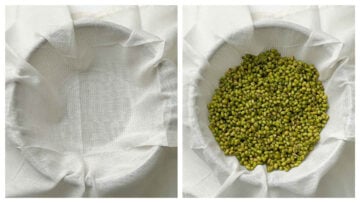
Step 2: Sprouting Moong Beans in a Cheesecloth
Place the soaked beans on a cheesecloth or muslin cloth.

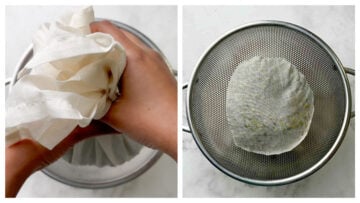
Gather all the edges of the cloth together and tie the ends securely to form a bundle. Then, place the bundle in a clean bowl or colander.
Store them in a warm, dark place away from direct sunlight. Normally, I keep them in my oven with lights on for warmth or in an Instant Pot with "Yogurt mode" on.

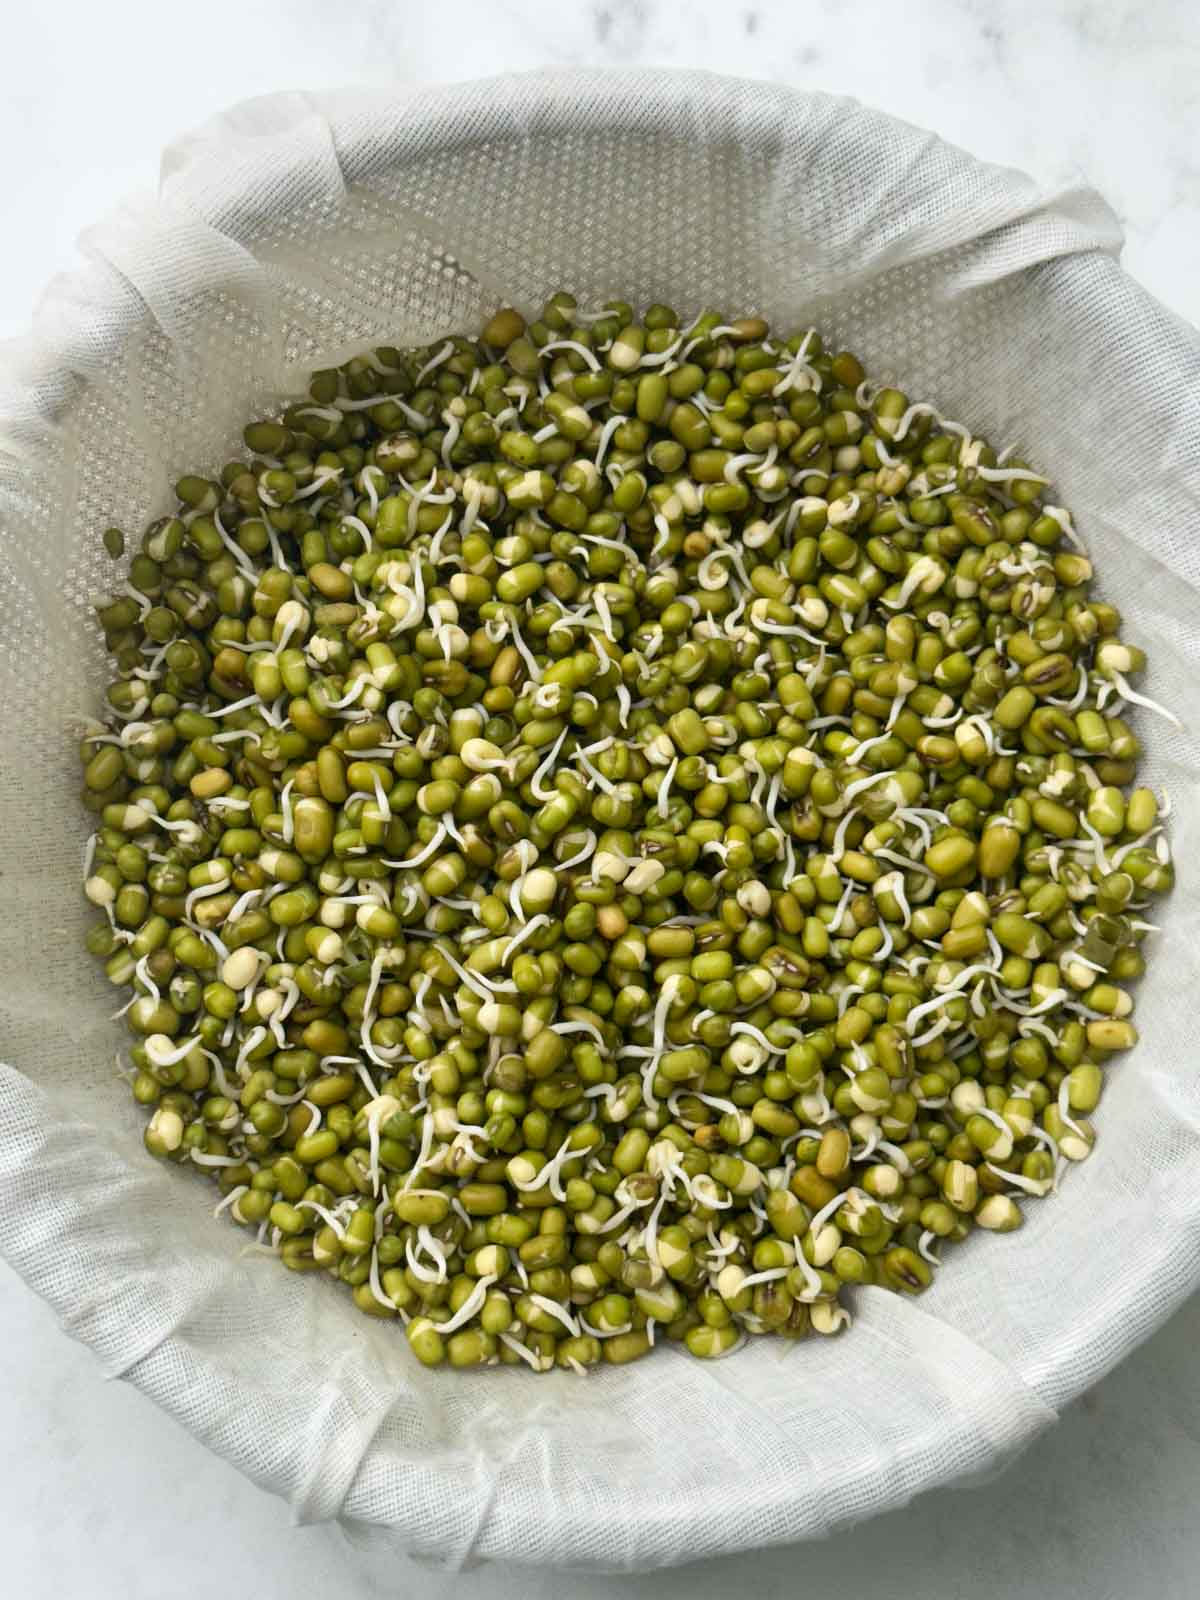
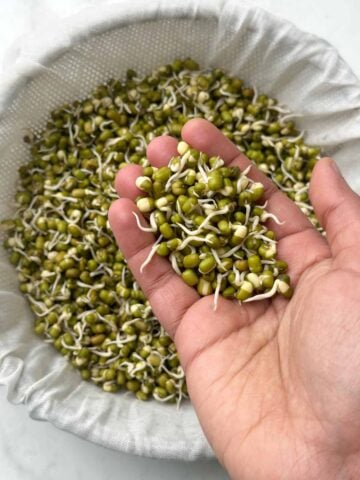
Beans will start to sprout in 12 hours, and this is how it looks, with small roots emerging from the bean. The exact timing of sprouting can vary depending on factors such as the type of bean, temperature, and moisture levels. Sprouting takes longer in Winter than in Summer.
Note: It's important to maintain moisture in the cloth while sprouting. If you notice that the kitchen napkin has become dry after a day or two, sprinkle some filtered water over it lightly.
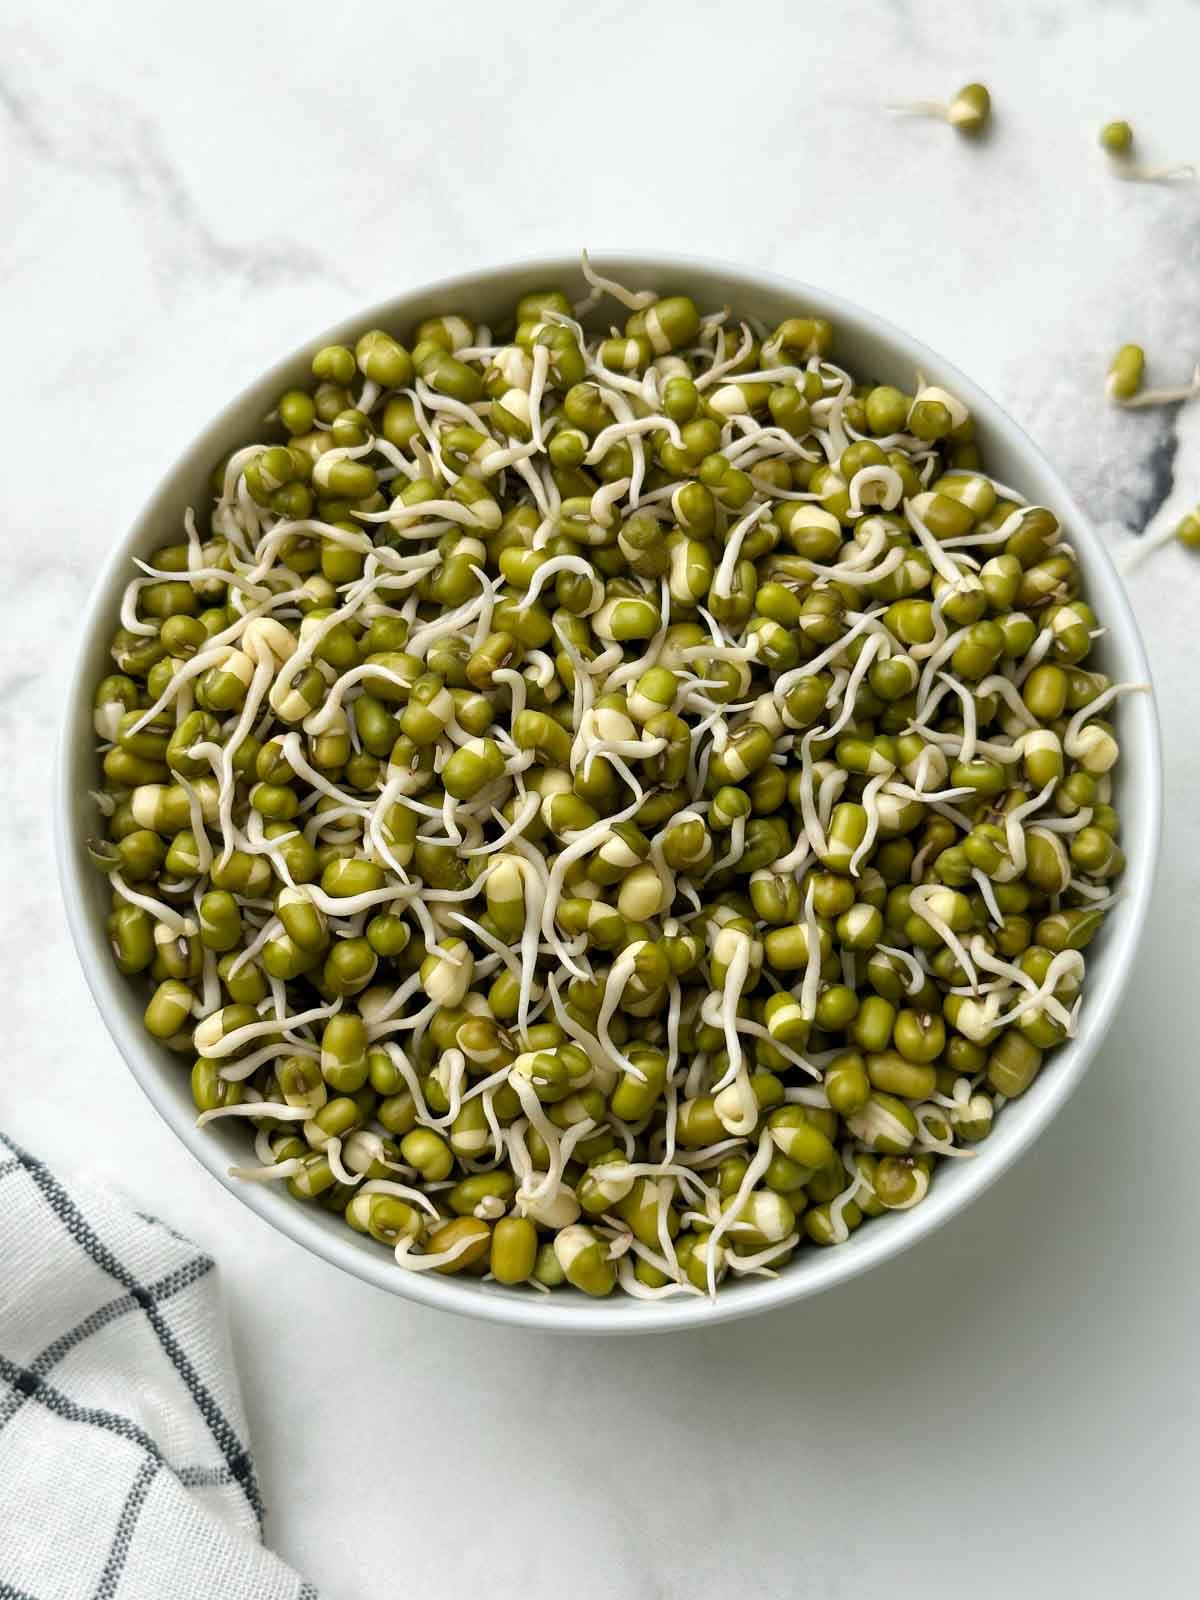
You can allow the moong beans to continue sprouting for another day or two to achieve longer sprouts. This is how it looks within 24 hours with a ½-inch long tail.

Sprouting Moong Beans using Instant Pot
Another option for sprouting is using an Instant Pot. Wrap the beans in cheesecloth and place them in a bowl on the trivet in the Instant Pot.
Set the Instant Pot to the "Yogurt" or "Keep Warm" setting and allow the beans to sit for 8-12 hours. You will see mung beans sprouting. Continue sprouting for another day to achieve longer sprouts.
How To Store Sprouts?
Rinse the sprouts, drain, and pat them dry thoroughly. Store in the fridge for up to a week in an airtight container or zip-lock bag.
Recipes In Which You Can Use Sprouts
Sprouts can be used in a variety of recipes. For instance, a simple sprouts curry to pair with steamed rice, or plain paratha, to a refreshing sprouted moong salad, or the popular Maharashtrian-style Misal Pav, or sprouts-based vegetable khichdi. You can experiment more; the choice is yours!
Tips And Tricks For Perfect Sprouting
Here are some of my exclusive advice on how to consistently get perfect sprouts. Take a look below:
- Choose high-quality beans: Use high-quality beans to sprout. Old beans may not sprout properly.
- Rinse the beans: Rinse the beans thoroughly under running water to remove any dirt or debris.
- Soak the beans in filtered water: Put the beans in filtered warm water to soak. Hard water can possibly restrict beans from soaking properly, which will, in turn, hinder sprouting.
- Keep the beans moist: Make sure to keep the beans moist during the sprouting process. If it's dry, sprinkle some water on the cheesecloth to keep it moist.
- Make sure the sprouting area is clean and dry: Ensure the sprouting area is clean and in a warm, dry location. Otherwise, sprouts can get contaminated and become sticky and smelly.
- No Cheesecloth: If you don't have cheesecloth, you can use any thin cotton cloth, or muslin cloth to sprout the beans.
- Store the sprouted beans correctly: Once the beans have sprouted, rinse them thoroughly, and store them in the fridge in an airtight container for up to 1 week.
Frequently Asked Questions
Since seeds and beans require warm, humid conditions to sprout and thrive, raw or undercooked sprouts provide a danger of food-borne illness. In warm and humid environments, bacteria that may make you sick, such as Salmonella, Listeria, and E. coli, grow.
Bean sprouts are a good source of protein and minerals. The root vegetable may be used to treat a number of ailments without harming your general health. Bean sprouts are a delightful and crispy addition to any salad. You can also add it to the soups to increase their nutritional value.
It can take as little as one to two days for beans to sprout, and three to four days for them to reach an edible size.
First, let's understand why this happens. This happens when there is too much water on your sprouts. Mold may grow easily if the sprouts are too damp in between rinses and there isn't enough airflow.
More Cooking 101 Recipes


How to Sprout Beans
Ingredients
- 1 cup mung beans
- 2 cups water for soaking
Instructions
Step 1: Rinse And Soak
- Rinse the moong beans thoroughly in cold water and remove any debris or damaged beans.

- Transfer the rinsed moong beans to a large bowl and add 2-3 cups of filtered water to cover the beans by about two inches. Soak them for at least 8-12 hours. Just cover the beans with a thin kitchen towel. Do not cover the beans with a lid, as they may develop an odor.
- After the soaking period, the beans would have doubled in size. Discard the water and rinse the moong beans again under running water and drain the water using a strainer or colander.


Step 2: Sprouting Moong Beans in a Cheesecloth
- Placing the soaked beans on a cheesecloth or muslin cloth.
- Gather all the edges of the cloth together and tie the ends securely to form a bundle. Then, place the bundle in a clean bowl or colander.
- Store them in a warm, dark place away from direct sunlight. Normally, I keep them in my oven with lights on for warmth or in an Instant Pot with "Yogurt mode" on.
- Beans will start to sprout in 12 hours, and this is how it looks, with small roots emerging from the bean. The exact timing of sprouting can vary depending on factors such as the type of bean, temperature, and moisture levels. Sprouting takes longer in Winter than in Summer.Note: It's important to maintain moisture in the cloth while sprouting. If you notice that the kitchen napkin has become dry after a day or two, sprinkle some filtered water over it lightly.

- You can allow the moong beans to continue sprouting for another day or two to achieve longer sprouts. This is how it looks within 24 hours with a ½-inch long tail.

Sprouting Beans using Instant Pot
- Another option for sprouting is using an Instant Pot. Wrap the beans in cheesecloth and place them in a bowl on the trivet in the Instant Pot.Set the Instant Pot to the "Yogurt" or "Keep Warm" setting and allow the beans to sit for 8-12 hours. You will see mung beans sprouting. Continue sprouting for another day to achieve longer sprouts.
Notes
Tips And Tricks For Perfect Sprouting
Here are some of my exclusive advice on how to consistently get perfect sprouts. Take a look below:- Choose high-quality beans: Use high-quality beans to sprout. Old beans may not sprout properly.
- Rinse the beans: Rinse the beans thoroughly under running water to remove any dirt or debris.
- Soak the beans in filter water: Put the beans in filtered warm water to soak. Hard water can possibly restrict beans from soaking properly, which will, inturn, hinder sprouting.
- Keep the beans moist: Make sure to keep the beans moist during the sprouting process. If it's dry, sprinkle some amount of water on the cheesecloth to keep it moist.
- Make sure the sprouting area is clean and dry: Ensure the sprouting area is clean and in a warm, dry location. Otherwise, sprouts can get contaminated and become sticky and smelly.
- No Cheesecloth: If you don't have cheesecloth, you can use any thin cotton cloth, or muslin cloth to sprout the beans.
- Store the sprouted beans correctly: Once the beans have sprouted, rinse them thoroughly, and store them in the fridge in an airtight container for up to 1 week.
Nutrition
★ Like this recipe? FOLLOW ME on Facebook, Instagram, Pinterest, and Youtube for more quick & easy recipes.


Radha Krishnan Siva Kumar
Nice and easy explanation
Bhavana Patil
Thank you so much Radha