
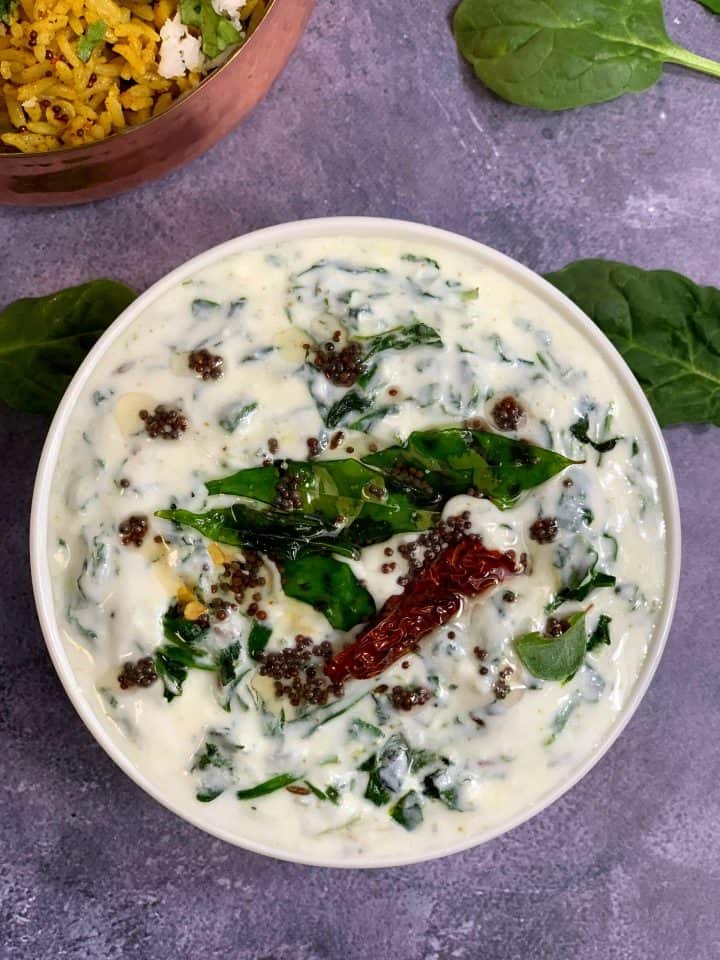
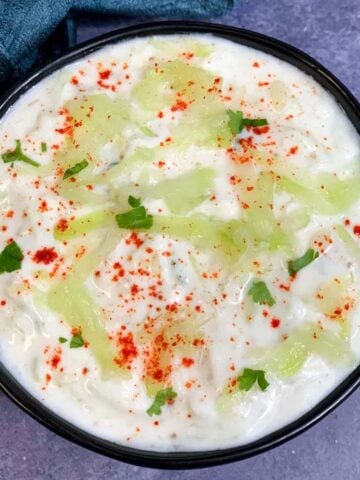
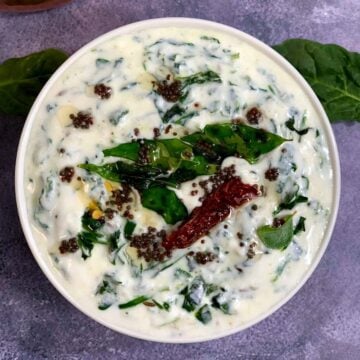
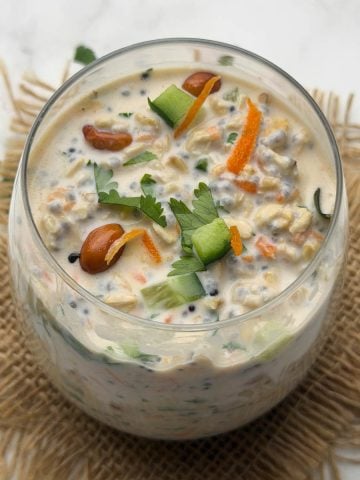
Spinach (Palak) Ka Raita is an easy and healthy South Indian-style raita recipe made with yogurt (curd), sauteed spinach, and spices. It pairs well with vegetable pulao and veggie biryani or can be enjoyed as it is. It's low-carb and kid-friendly.
Cucumber raita and onion tomato raita are staples on our dinner table. I first discovered spinach raita when I tried it at my friend Rekha's place. She is a great cook and has inspired me to explore various healthy recipes.
It is also known as "keerai thayir pachadi" or "keerai raita" in Tamil.
If you are making this for your kid, you can saute and puree the spinach and add it to yogurt. They will love the green color and not realize some spinach is in it.
Spinach is a favorite at home; I often prepare palak paratha, dal palak, palak paneer, or creamy spinach pasta for our meals. If you are looking for more such easy spinach recipes, do check palak recipes from my blog.
Jump to:
Ingredients
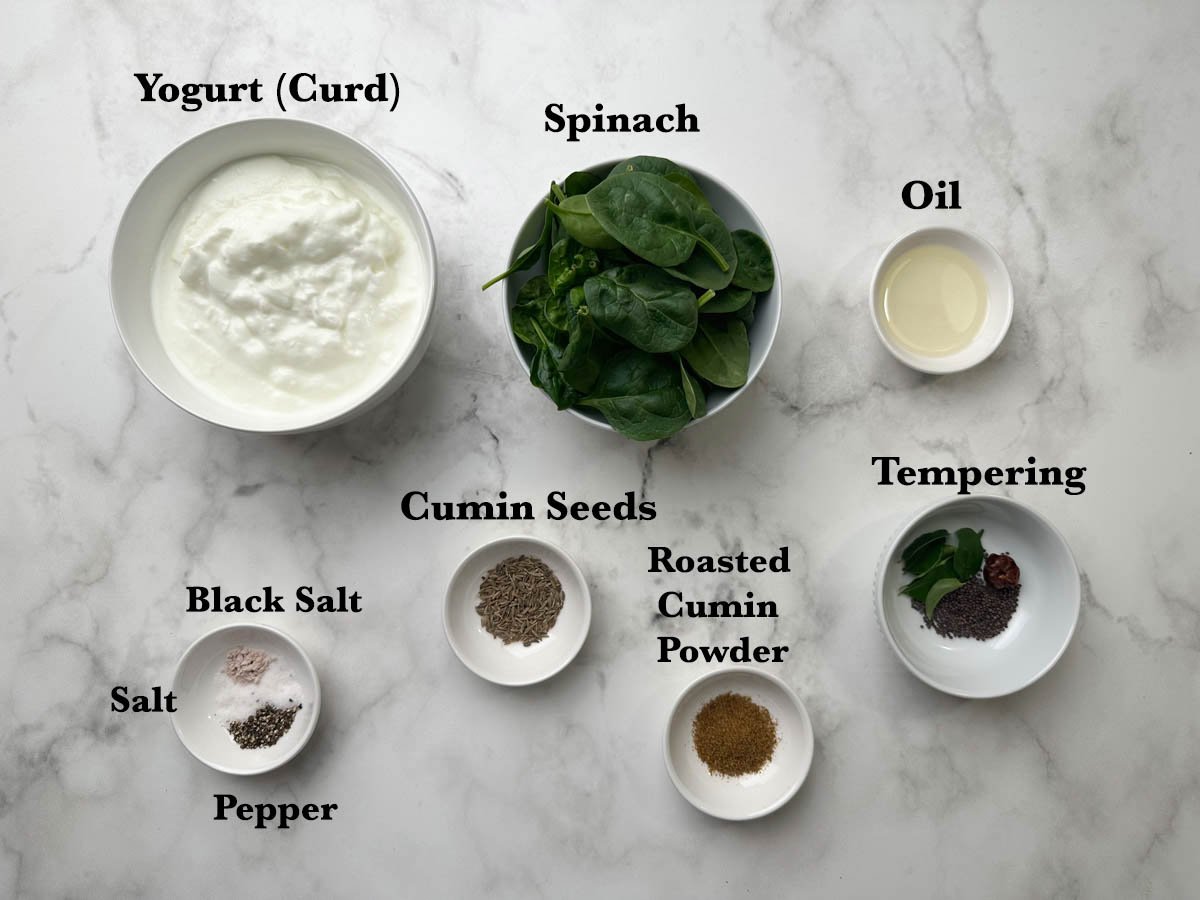
- Yogurt (curd): Use homemade or store-bought full-fat plain yogurt (a.k.a curd or dahi) for this raita. You can also use low-fat yogurt or Greek yogurt.
- Spinach: I used organic baby spinach and finely chopped them.
- Spices: I used cumin seeds, roasted jeera powder, salt, black salt, and black pepper.
- Tempering: I used mustard seeds, dried red chili, and curry leaves.
How to Make Easy Palak Raita at Home
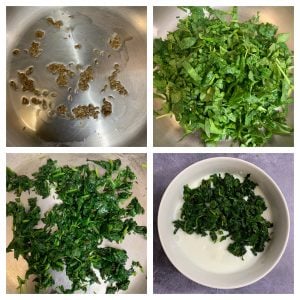
Firstly, heat 1 teaspoon of oil in a pan. Add 1 teaspoon cumin seeds. Let them splutter.
Add 2 cups chopped spinach and salt to taste, and saute for 2-3 minutes until the leaves are wilt or cooked well. Cool the mixture, and then before adding it to the yogurt.
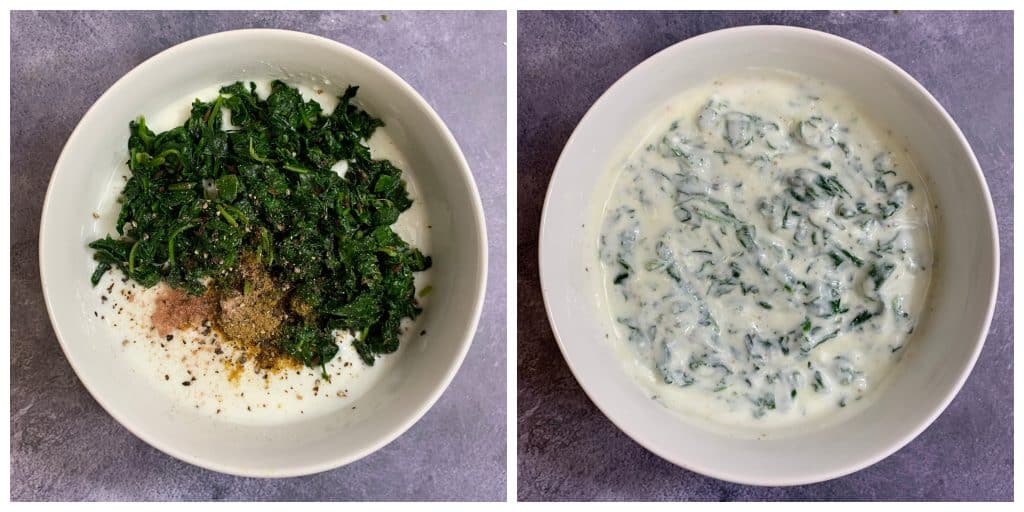
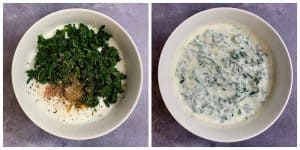
Whisk 2 cups of homemade yogurt (or curd) in a large mixing bowl. Add the sautéed spinach mixture to the yogurt.

Then add the spices, such as ½ teaspoon roasted cumin powder, ½ teaspoon black salt, ¼ teaspoon pepper, and regular salt to taste. Mix well. At this stage, taste to ensure the seasoning is balanced.
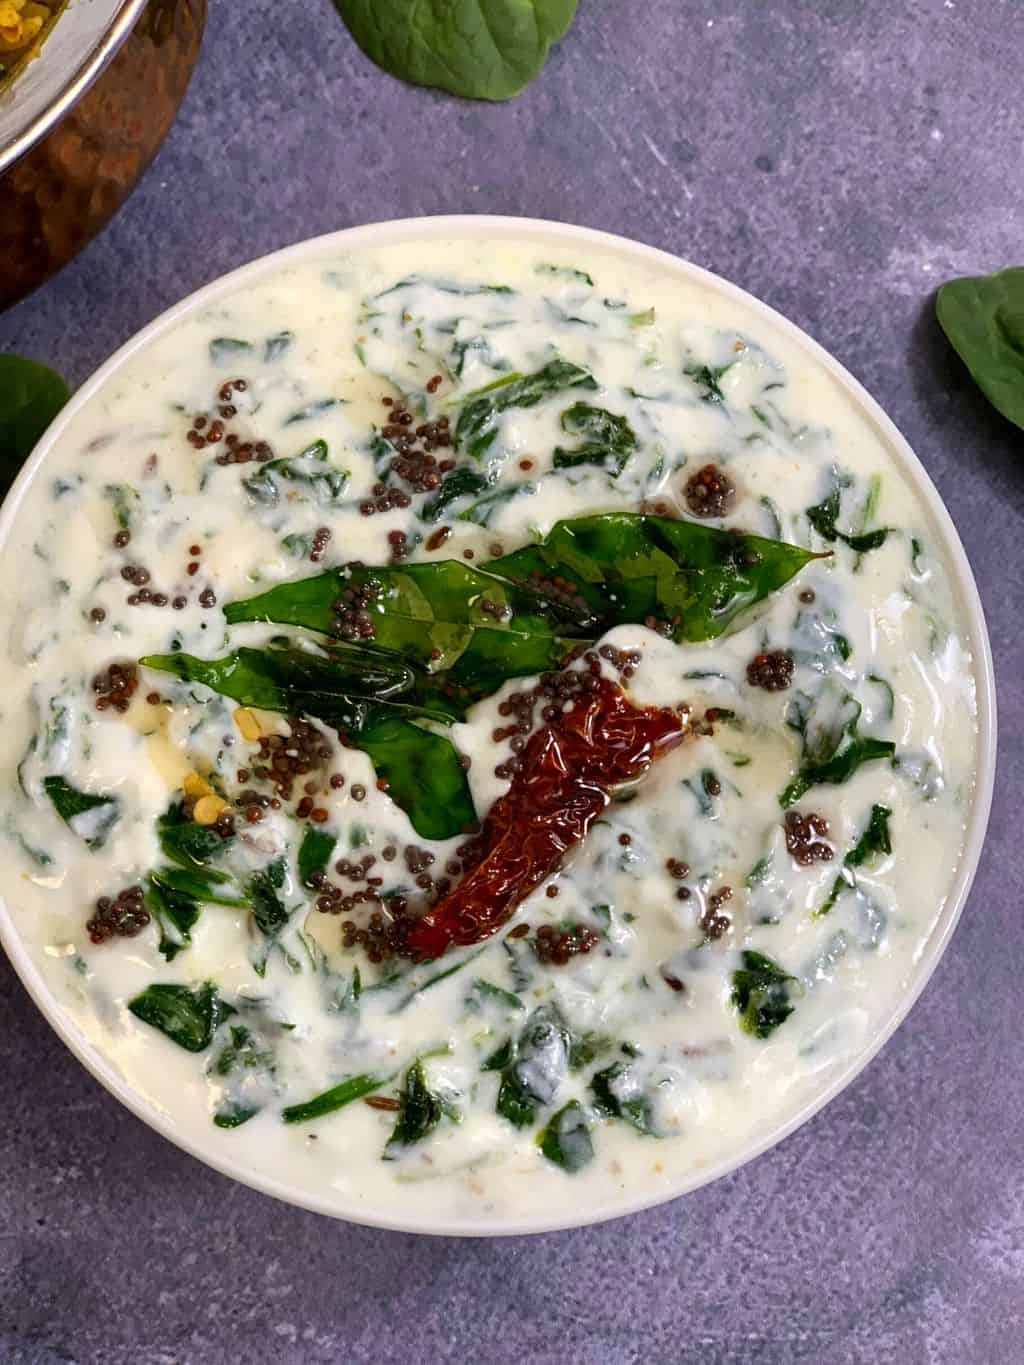
Prepare the tempering by heating 1 teaspoon of oil. Once hot, add ½ teaspoon mustard seeds, 1 dry red chilies, and a few curry leaves, and let them crackle for a few seconds. This step is optional.
Pour the tempering over the palak ka raita. Serve chilled.
How to Serve Spinach Raita
This healthy spinach raita can be served with parathas, along with curries, or dal. It also pairs wonderfully with paneer biryani and veg pulao.
Variations
- You may add vegetables like chopped onions, cucumbers, tomatoes, and grated carrots for extra texture and nutrition.
- You can also add fresh herbs like finely chopped mint (pudina) or coriander leaves for added flavor.
- Try using spinach raita as a dip for crunchy veggie sticks like celery, carrots, and bell peppers.
Expert Tips
- Make sure to sauté or blanch the spinach, as raw spinach doesn't taste great in this raita. You can also sauté green chilies along with the spinach.
- Adding milk prevents the yogurt from turning sour. If you are using fresh yogurt, skip it.
- If the palak raita becomes too thick, add a little water to achieve the desired consistency.
- To make this easy palak ka raita recipe low-carb or Keto-friendly, use Greek Yogurt.
More Raita Recipes
Palak Raita | Spinach Raita
Ingredients
- 2 cups yogurt (curd)
- 2 cups palak (spinach) finely chopped
- 1 teaspoon cumin (jeera) seeds
- ½ teaspoon roasted cumin (jeera) powder
- ½ teaspoon black salt
- ¼ teaspoon black pepper
- salt to taste
- 1 teaspoon oil
Tempering:
- 1 teaspoon oil
- 1 dry red chilli
- ½ teaspoon mustard seeds
- few curry leaves
Instructions
- Firstly, heat 1 teaspoon of oil in a Kadai. Add cumin seeds. Let them splutter.
- Add chopped spinach and salt, then sauté for 2-3 minutes until the leaves are wilted and cooked well. Let the mixture cool before adding it to the yogurt.
- Whisk the yogurt (or curd) in a large mixing bowl. Add the sautéed spinach mixture to the yogurt.

- Then add the spices, such as roasted cumin powder, black salt, pepper, and regular salt. Mix well. At this stage, taste to ensure the seasoning is balanced.

- Prepare the tempering by heating 1 teaspoon of oil. Once hot, add mustard seeds, red chilies, and curry leaves, and let them crackle for a few seconds. This step is optional.
- Pour the tempering over the palak ka raita. Palak Raita is ready, Serve chilled.

Notes
Tips & Variations
-
- Make sure to sauté or blanch the spinach, as raw spinach doesn't taste great in this raita. You can also sauté green chilies along with the spinach.
- Adding milk prevents the yogurt from turning sour. If you are using fresh yogurt, skip it.
- If the palak raita becomes too thick, add a little water to achieve the desired consistency.
- To make this easy palak ka raita recipe low-carb or Keto-friendly, use Greek Yogurt.
- You may add vegetables like chopped onions, cucumbers, tomatoes, and grated carrots for extra texture and nutrition.
- You can also add fresh herbs like finely chopped mint (pudina) or coriander leaves for added flavor.
- Try using spinach raita as a dip for crunchy veggie sticks like celery, carrots, and bell peppers.
Nutrition
★ Like this recipe? FOLLOW ME on Facebook, Instagram, Pinterest, and Youtube for more quick & easy recipes.
Leave a Reply